How to Make a Travel First Aid Kit
Whilst on the road traveling, I am always surprised by how few backpackers carry a travel first aid kit. Maybe it’s easily overlooked, perhaps it’s not considered necessary and sacrificed during the quest to attain a lighter backpack, or maybe it’s dismissed just on a cost basis; however, you can pick up a cheap one online. I don’t know the exact reason, but what I do know is that a travel first aid kit can be worth its weight in gold – at worst, it can provide some peace of mind and, at best, could even avert a trip ruining calamity.
What follows below is a quick guide to knocking up your own tailor-made DIY backpacking first aid kit – it’s small, light, cheap, and, most importantly, for its size, it’s incredibly useful.
Of course, it is just that: a baseline first aid kit, not an operating theatre. You could add more to it to cover more eventualities, but where do you draw the line?
Here Is How To Make a Cheap Travel First Aid Kit for Backpackers:
Here Is a Checklist of What You Should Pack in Your DIY Travel First Aid Kit

2 x 10cm squared sealed sheets of padded, sterile gauze – Can be cut to size and used for cuts and scrapes too big for plasters. Nb. To avoid unwanted contamination of unused pieces, simply seal them back up in a small Ziploc bag. Buy on Amazon
A small roll of sticky, 3-4cm wide fabric medical tape – Can be used with the gauze to make larger plasters, or to secure a larger field dressing made from a T-shirt or such like. If medical tape costs a few cents too many, good ol’ duct tape is another option – but remember it isn’t quite as sticky and loses its tack on material much quicker. Buy on Amazon
A couple of 10cmx20cm ‘cut-your-own’ style strips of plasters – These save the need for a large assortment of different size plasters. Buy on Amazon
One strip each of Tylenol, and Ibuprofen – Among other things, Tylenol can reduce fever and stop you feeling ill, and Ibuprofen is also great for hangovers!
A small tube of hydrocortisone cream – Essential for bites and stings. This one comes in 3 smaller tubes so it is easier to pack.
A small tube of antiseptic cream – Ideal pre-treatment of cuts and scrapes. Buy on Amazon
Antiseptic wipes – virtually no weight at all and another ideal pre-treatment. Failing that, clean bottled water can also be used. Buy on Amazon
Safety pins – Superb for hooking out splinters (remember: if need be, before you go digging about in your body with one, it can always be sterilized over a flame/in boiling water first). It can also be used to fasten makeshift slings/bandages or just to blend in on any foreign punk scene! Buy on Amazon
A sealed and sterile drip needle, syringe, and a couple of extra needles – If things are bad enough to need these, you will probably already have medical attention, but at least you won’t have to worry about the hygiene of existing supplies if in a developing country. These items should be kept together with a certificate stating the issuing doc’s name and contact details in case of border/airport searches. My doc was kind enough to give me these, along with the cover letter; it may be worth asking yours for the same.
Set of latex barrier gloves – They weigh virtually nothing and may make you more inclined to help others in difficulty, or indeed others to help you. Buy on Amazon
Tiger balm – A little beauty most worthy of inclusion. Not only is it a great way to soothe those muscle strains gained from canopy swings and waterfall jumps, but during evening time, it’s also perfect when smeared on your feet and ankles to deter them darn mozzies! Buy on Amazon
Some Things To Keep In Mind When Making Your Safety Kit
- Assuming you already carry a penknife, I have excluded scissors from the list.
- If you want to go really cheap on this, it can’t harm to explain your travel plans to the doctor/ hospital staff as they may even be willing to contribute some of the contents free of charge. It never hurts to ask; what’s the worst they can say?
- As mentioned already, you could add to this baseline budget first aid kit until the cows come home – but these cheap and rudimentary first aid items should suffice to cover everyday mishaps such as cuts, bites, bumps, strains, and stings…and hangovers.
- Remember to improvise. Just because something isn’t in the first aid kit, it doesn’t mean that you can’t deal with the problem. Eyewash=bottled water, tubular bandage=sock with end cut off, splint=stick, tourniquet=belt, sling=sarong/towel, bandage=sarong/t-shirt, field dressing=sarong/clothing.
First Aid Kit Container

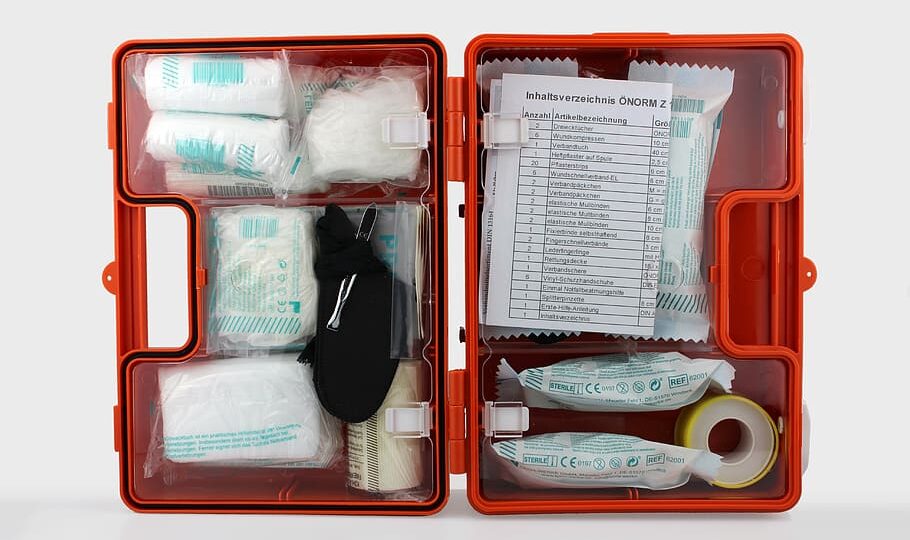
Ok, now that you have the contents of your first aid kit, you’re going to need something to put them in. We need cheap, durable, and light. We need Tupperware! You know the drill here: Wal-Mart, Tescos, or Amazon. But what box? With so many on offer here are some pointers to help you make the right choice: –
Pick a box only just big enough to house all your first aid kit contents – if it’s too big, not only will your stuff rattle around in it (possibly damaging it/breaking seals, etc.) but over time you may also be tempted to stash other stuff in there too, and before you know it you will be in need of a plaster but first have to fish through Guatemalan embroidered hankies, Thai wristbands and all sorts of another sh*t before you can go about the serious business of stopping the leak.
Pick a transparent box – Then you can immediately see where everything is in the box before you have even opened it and other folks – such as border guards or airport officials – can too. It may mean the difference between a cursory glance and you have to fish everything out (and risk exposing the contents to potential contamination) during a search.
Pick a box that well suited to the size and shape of your particular rucksack/daysack and also your specific needs – it’s all about space-saving as well as weight reduction. Personally, I would go for a shallow and wide box for both easy access to the contents and ease of stowing.
Alternativly, You Can Get a Cheap Ready to Go Travel First Aid Kit From Amazon
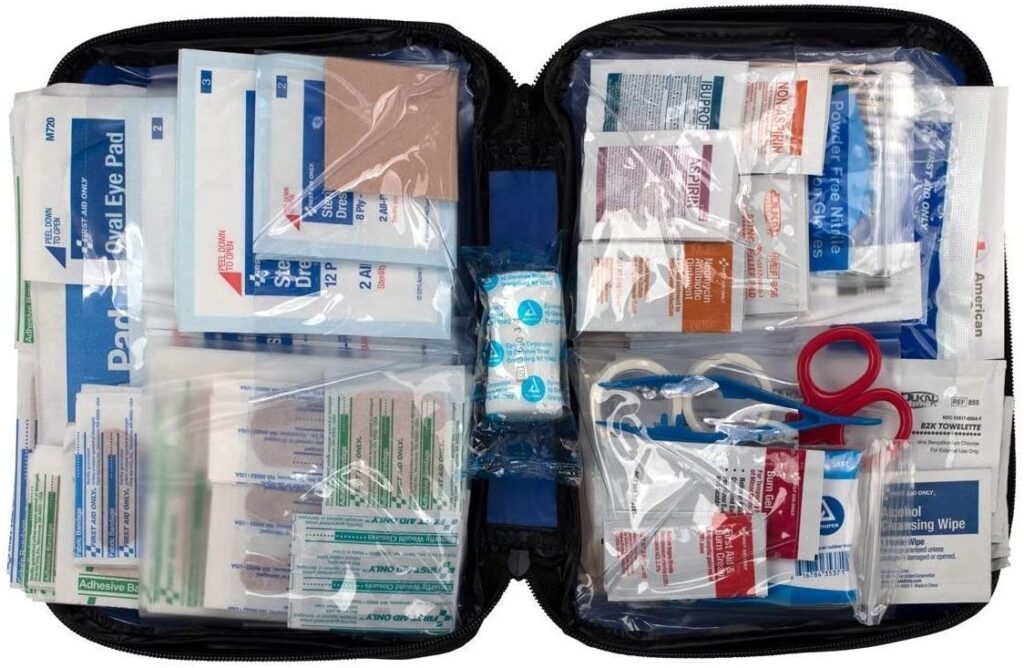
There are many pre-packed and ready to go travel safety kits for sale on Amazon. It will also be cheaper for you because all the things are pre-packed and you won’t need to buy one of everything just to pack only one-third of the products purchased.
How to Make a Travel First Aid Kit – Summary
Taking the above into account you should easily end up with an adequate first aid kit that takes up less space than a couple of packs of cigarettes and costs well under 15 bucks (You could even do it for free!). So, before buying a ridiculously overpriced commercial traveler’s first aid kit from a firm cashing in on that significant trip anxiety, why don’t you give it a go yourself?
Remember, though, it’s dinky small for a reason: so you can transfer it from your rucksack to your daypack when your out and about. Its no use having a kick-ass first aid kit if you have a scrape whilst out doing adventurous things, and the kick-ass first aid kit is back in the hostel sitting on your bed!
While on the subject of Travel First Aid Kits, it’s worth considering the one thing you can take on your travels that takes up no space in the backpack and weighs nothing on your shoulders. Knowledge! Although I hope that you will not need it, it’s entirely possible you may face more dangerous situations during traveling than you did at home. So why not consider taking a day or two out and sign up on a first aid course to learn some necessary basic skills?

